
Creating a thriving garden space is both an art and a science. Whether you’re a beginner or a seasoned pro, having the right tools and knowledge can make all the difference. This guide walks you through 15 essential steps to transform your garden into a lush, productive haven.
With over 15 years of professional experience, we’ve gathered expert insights to help you avoid common pitfalls. From poor tomato yields to improper soil preparation, we’ll show you how to plan effectively for success. This guide is perfect for raised beds, in-ground gardens, or mixed setups of vegetables and flowers.
Discover time-tested strategies for soil health, plant selection, and sustainable maintenance. These steps ensure your garden thrives year after year, making the process enjoyable for the whole family. Let’s get started on your journey to a greener, more vibrant space!
Key Takeaways
- Learn 15 essential steps to create a thriving garden.
- Gain expert insights from over 15 years of experience.
- Avoid common mistakes like poor soil preparation.
- Apply strategies for raised beds, in-ground gardens, and mixed setups.
- Discover sustainable maintenance tips for long-term success.
1. Planning Your Gardening Yard
A well-planned garden starts with understanding your space and its potential. Before you dig in, take time to assess your area. This ensures your plants thrive and your efforts yield the best results.
Assessing Your Space
Start by evaluating the amount of sunlight your area receives. Most vegetables need at least 5 hours of direct sun each day. Use a sunlight calculator or smartphone apps to track patterns over multiple days. This helps map microclimates and identify the sunniest spots.
If your space is shady, don’t worry. Some plants, like leafy greens, can grow with less sun. Make sure to choose varieties suited to your conditions. Additionally, check for flat terrain. Sloped areas can be managed with terracing using repurposed materials.

Choosing the Right Location
Proximity to water sources is key. Ensure your garden is close to a spigot or hose for easy watering. Accessibility is also important. Plan pathways wide enough for wheelbarrows and tools.
Keep an eye on nearby trees. Their roots can compete with your plants for nutrients. Install a tree root barrier using galvanized metal roofing to protect your garden. A safe distance from tree drip lines is at least 10 feet.
By carefully planning your garden space, you set the stage for a healthy and productive growing season. Take the time to assess and prepare, and your plants will thank you!
2. Preparing Your Soil
Healthy soil is the foundation of a successful growing space. Without proper preparation, plants struggle to thrive. Start by testing your soil and enriching it with organic matter. This ensures your plants get the nutrients they need to grow strong and healthy.
Testing Soil pH
Soil pH affects how well plants absorb nutrients. Use a DIY kit or visit a cooperative extension service for accurate results. Dandelions often indicate alkaline soil, while moss suggests acidity. Adjust pH levels to match your plants’ needs for optimal growth.
Double-digging is a great way to aerate the soil. Use a pitchfork to loosen the ground to a depth of 18 inches. This method improves drainage and allows roots to spread more easily.

Adding Organic Matter
Organic matter like compost enriches the soil. Layer 3 inches of compost over newspaper sheets to create weed-free beds. This lasagna gardening method is simple and effective.
Avoid fresh manure, as it can burn plant roots. Instead, use aged manure or compost to add nutrients safely. For clay or sandy soils, mix in coir fiber or peat moss to improve texture.
Here’s a quick guide to soil amendments:
| Amendment | Benefit | Best For |
|---|---|---|
| Compost | Adds nutrients, improves texture | All soil types |
| Glacial Rock Dust | Boosts mineral content | Nutrient-deficient soil |
| Sea Soil | Enhances microbial activity | Organic gardening |
| Rock Phosphate | Provides long-term phosphorus | Flowering plants |
Take time to prepare your soil properly. This ensures your plants have the best start possible. With the right amendments, your soil will support healthy growth for years to come.
3. Selecting the Right Plants
Choosing the right plants is the first step to a flourishing garden. Whether you’re growing vegetables, flowers, or a mix of both, picking species that thrive in your climate and suit your needs is essential. This ensures your garden stays healthy and productive throughout the season.

Choosing Plants for Your Climate
Start by matching plants to your USDA hardiness zone. Cold-hardy options like kale and Russian sage are perfect for cooler regions. For warmer areas, tomatoes and peppers are excellent choices. Use resources from your local extension service to calculate frost dates and plan accordingly.
Nursery tags are a great way to identify plants that suit your conditions. Look for labels that indicate full-sun or shade-tolerant species. Combining edible flowers like calendula with vegetables adds beauty and functionality to your garden.
Annuals vs. Perennials
Annuals, like marigolds and zinnias, bloom for one season and are ideal for adding quick color. Perennials, such as daylilies, return year after year, making them a long-term investment. Consider succession planting to stagger bloom times and keep your garden vibrant.
Here’s a quick guide to help you decide:
- Annuals: Perfect for seasonal color and experimenting with new varieties.
- Perennials: Low-maintenance and great for long-term garden structure.
- Vegetables: Choose beginner-friendly picks like cucumbers for easy success.
By selecting the right plants, you create a garden that’s not only beautiful but also tailored to your family’s needs. Take the time to research and plan, and you’ll enjoy a thriving space for years to come.
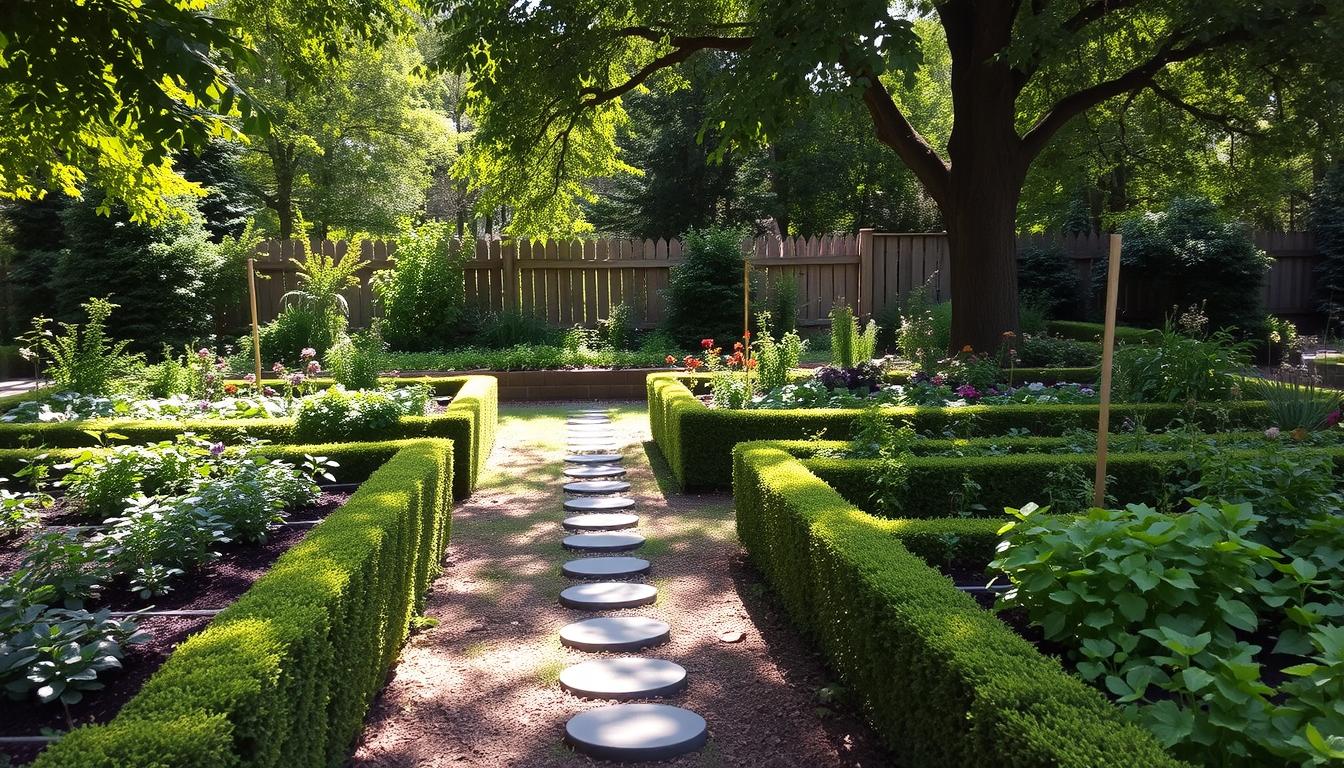
4. Building Garden Beds
Designing your garden beds is a crucial step in creating a functional and beautiful outdoor space. Whether you choose raised beds or in-ground options, the right setup ensures healthy plant growth and easy maintenance. Let’s explore the key considerations for building beds and pathways that work for your needs.
Raised Beds vs. In-Ground Beds
Raised beds offer excellent drainage and are ideal for areas with poor soil quality. They also reduce strain on your back, making them a favorite for many gardeners. Cedar and composite are popular materials for raised beds, with cedar being naturally rot-resistant and composite offering long-term durability.
In-ground beds, on the other hand, are cost-effective and blend seamlessly with your landscape. For improved drainage, consider sunken bed construction. This method involves digging trenches and filling them with gravel or sand to prevent waterlogging.

When choosing between raised and in-ground beds, consider your space and accessibility needs. Raised beds are perfect for small areas, while in-ground beds work well for larger plots.
Creating Pathways
Pathways are essential for navigating your garden without compacting the soil. Aim for dimensions of 21-24 inches to allow easy access for wheelbarrows and tools. Use landscape fabric under pathways to suppress weeds and keep them tidy.
For sloped areas, build terraced beds using reclaimed wood slabs. This creates a level surface and prevents soil erosion. Position beds in north-south rows to ensure even sunlight distribution across your plants.
Here are some additional tips for building and maintaining pathways:
- Line beds with hardware cloth to deter burrowing pests.
- Keep pathways clear of debris to prevent tripping hazards.
- Use mulch or gravel to define pathways and reduce mud.
By carefully planning your beds and pathways, you create a garden that’s both functional and visually appealing. Take the time to choose the right materials and layout, and your plants will thrive in their new home.
5. Essential Gardening Tools
Having the right tools can transform your garden work into a seamless and enjoyable experience. Whether you’re just starting or have years of experience, the proper equipment saves time and effort. This section covers must-have tools for beginners and advanced options for pros.

Must-Have Tools for Beginners
Every beginner needs a basic toolkit to get started. A spade is essential for digging and turning soil. A trowel helps with planting small flowers or vegetables. Pruners are perfect for trimming plants and making clean cuts. A garden kneeler reduces strain on your joints while working close to the ground.
When choosing pruners, compare bypass and anvil styles. Bypass pruners are ideal for live plants, while anvil pruners work best for dead branches. Opt for tools with ergonomic handles to reduce fatigue during long work sessions.
Advanced Tools for Pros
For seasoned gardeners, upgrading to advanced tools can enhance efficiency. A broadfork aerates soil without disturbing its structure. A soil knife or Hori-Hori is versatile for digging, cutting, and weeding. Oscillating hoes make weed removal quick and easy.
Consider investing in a tiller for larger spaces. BHG-tested models are reliable and durable. Drip irrigation timers are a smart way to ensure your plants stay hydrated, even when you’re away.
Here’s a quick comparison of beginner and pro tools:
- Beginner Tools: Spade, trowel, pruners, garden kneeler.
- Pro Tools: Broadfork, soil knife, Hori-Hori, oscillating hoe.
- Upgrades: Tillers, drip irrigation timers.
By equipping yourself with the right tools, you’ll make garden work easier and more enjoyable. Whether you’re a beginner or a pro, these essentials ensure success every season.
6. Watering and Irrigation
Proper watering is the backbone of a healthy and vibrant outdoor space. Without the right system, plants can struggle to thrive. Whether you’re using a soaker hose or drip tape, efficient irrigation ensures your plants get the water they need without waste.

Setting Up an Efficient Watering System
Choosing the right irrigation method depends on your garden size and plant needs. Soaker hoses are affordable and easy to install, making them ideal for small areas. Drip tape, on the other hand, is more precise and cost-effective for larger spaces.
Here’s a quick comparison:
| Method | Cost | Best For |
|---|---|---|
| Soaker Hose | Low | Small gardens, flower beds |
| Drip Tape | Moderate | Large vegetable gardens |
Install shut-off valves to control water flow in specific zones. This allows you to customize watering schedules based on plant needs. Early morning is the best time to water, as it reduces evaporation and helps plants absorb moisture effectively.
Water Conservation Tips
Conserving water is essential, especially during dry seasons. Rain barrels are a simple way to collect and store rainwater for later use. Place them under downspouts to maximize collection.
For drought-prone areas, consider using ollas (clay pot irrigation). These porous pots release water slowly, keeping roots hydrated without overwatering. Another tip is to measure sprinkler output with tuna cans. This ensures even distribution across your garden.
Apply straw mulch around plants like tomatoes to retain moisture and reduce the need for frequent watering. By following these tips, you’ll save water and keep your plants healthy all season long.
7. Maintaining Your Gardening Yard
Keeping your outdoor space healthy and vibrant requires consistent care and attention. Proper maintenance ensures your plants thrive and your efforts yield the best results. This section covers essential tips for weed control, mulching, and fertilizing to keep your space in top shape.
Weed Control
Weeds can compete with your plants for nutrients and water, so controlling them is crucial. Start by identifying common types like crabgrass and purslane. Crabgrass spreads quickly, while purslane has succulent leaves and shallow roots.
Use newspaper or cardboard as a weed barrier. Layer them over the soil and cover with mulch to block sunlight and prevent weed growth. For pre-emergent control, apply corn gluten meal. This natural herbicide stops weed seeds from sprouting without harming your plants.

Mulching and Fertilizing
Mulch helps retain moisture, regulate soil temperature, and suppress weeds. Refresh mulch layers after heavy rains to maintain effectiveness. Organic options like straw or wood chips break down over time, adding nutrients to the soil.
For fertilizing, brew compost tea using simple steps. Fill a bucket with water, add compost, and let it steep for 24-48 hours. Strain the liquid and apply it to your plants. Comfrey fertilizer tea is excellent for heavy feeders like tomatoes and peppers.
Here are additional tips for long-term maintenance:
- Rotate crops each year to prevent soil-borne diseases.
- Test your soil every three years to monitor nutrient levels.
- Apply organic fertilizers like bone meal or fish emulsion during the growing season.
By following these practices, you’ll create a thriving space that’s both beautiful and productive. For more tips on starting your journey, check out this beginner’s guide.
8. Conclusion
Embarking on your green journey is a rewarding process that brings joy and fresh produce to your family. From planning to your first harvest, each step is a milestone worth celebrating. If you’re just starting, consider a small 100 sq ft trial garden. This is a great way to learn without feeling overwhelmed.
Involve your kids in seed-starting projects to make it a fun family activity. Keep a journal to track crop performance and note what works best each season. This helps you refine your skills and improve over time.
For more guidance, explore local master gardener programs. These resources provide expert advice tailored to your area. Whether you want grow vegetables, flowers, or both, the journey is as fulfilling as the results. Start small, stay curious, and enjoy the process!
For additional tips, check out this beginner’s guide to get started on the right foot.